Meeting Agenda Structure Template
The Meeting Agenda Structure Template Editor is where you design the "skeleton" of your meeting. By setting up a template, you establish a consistent framework that ensures every generated agenda adheres to your club’s specific traditions and timing. While the template provides a default structure, you retain the flexibility to override these settings on a meeting-by-meeting basis in the Upcoming Meeting Editor, allowing for adjustments and exceptions as needed.
To access this, navigate to Meeting Agenda > Structure Template.
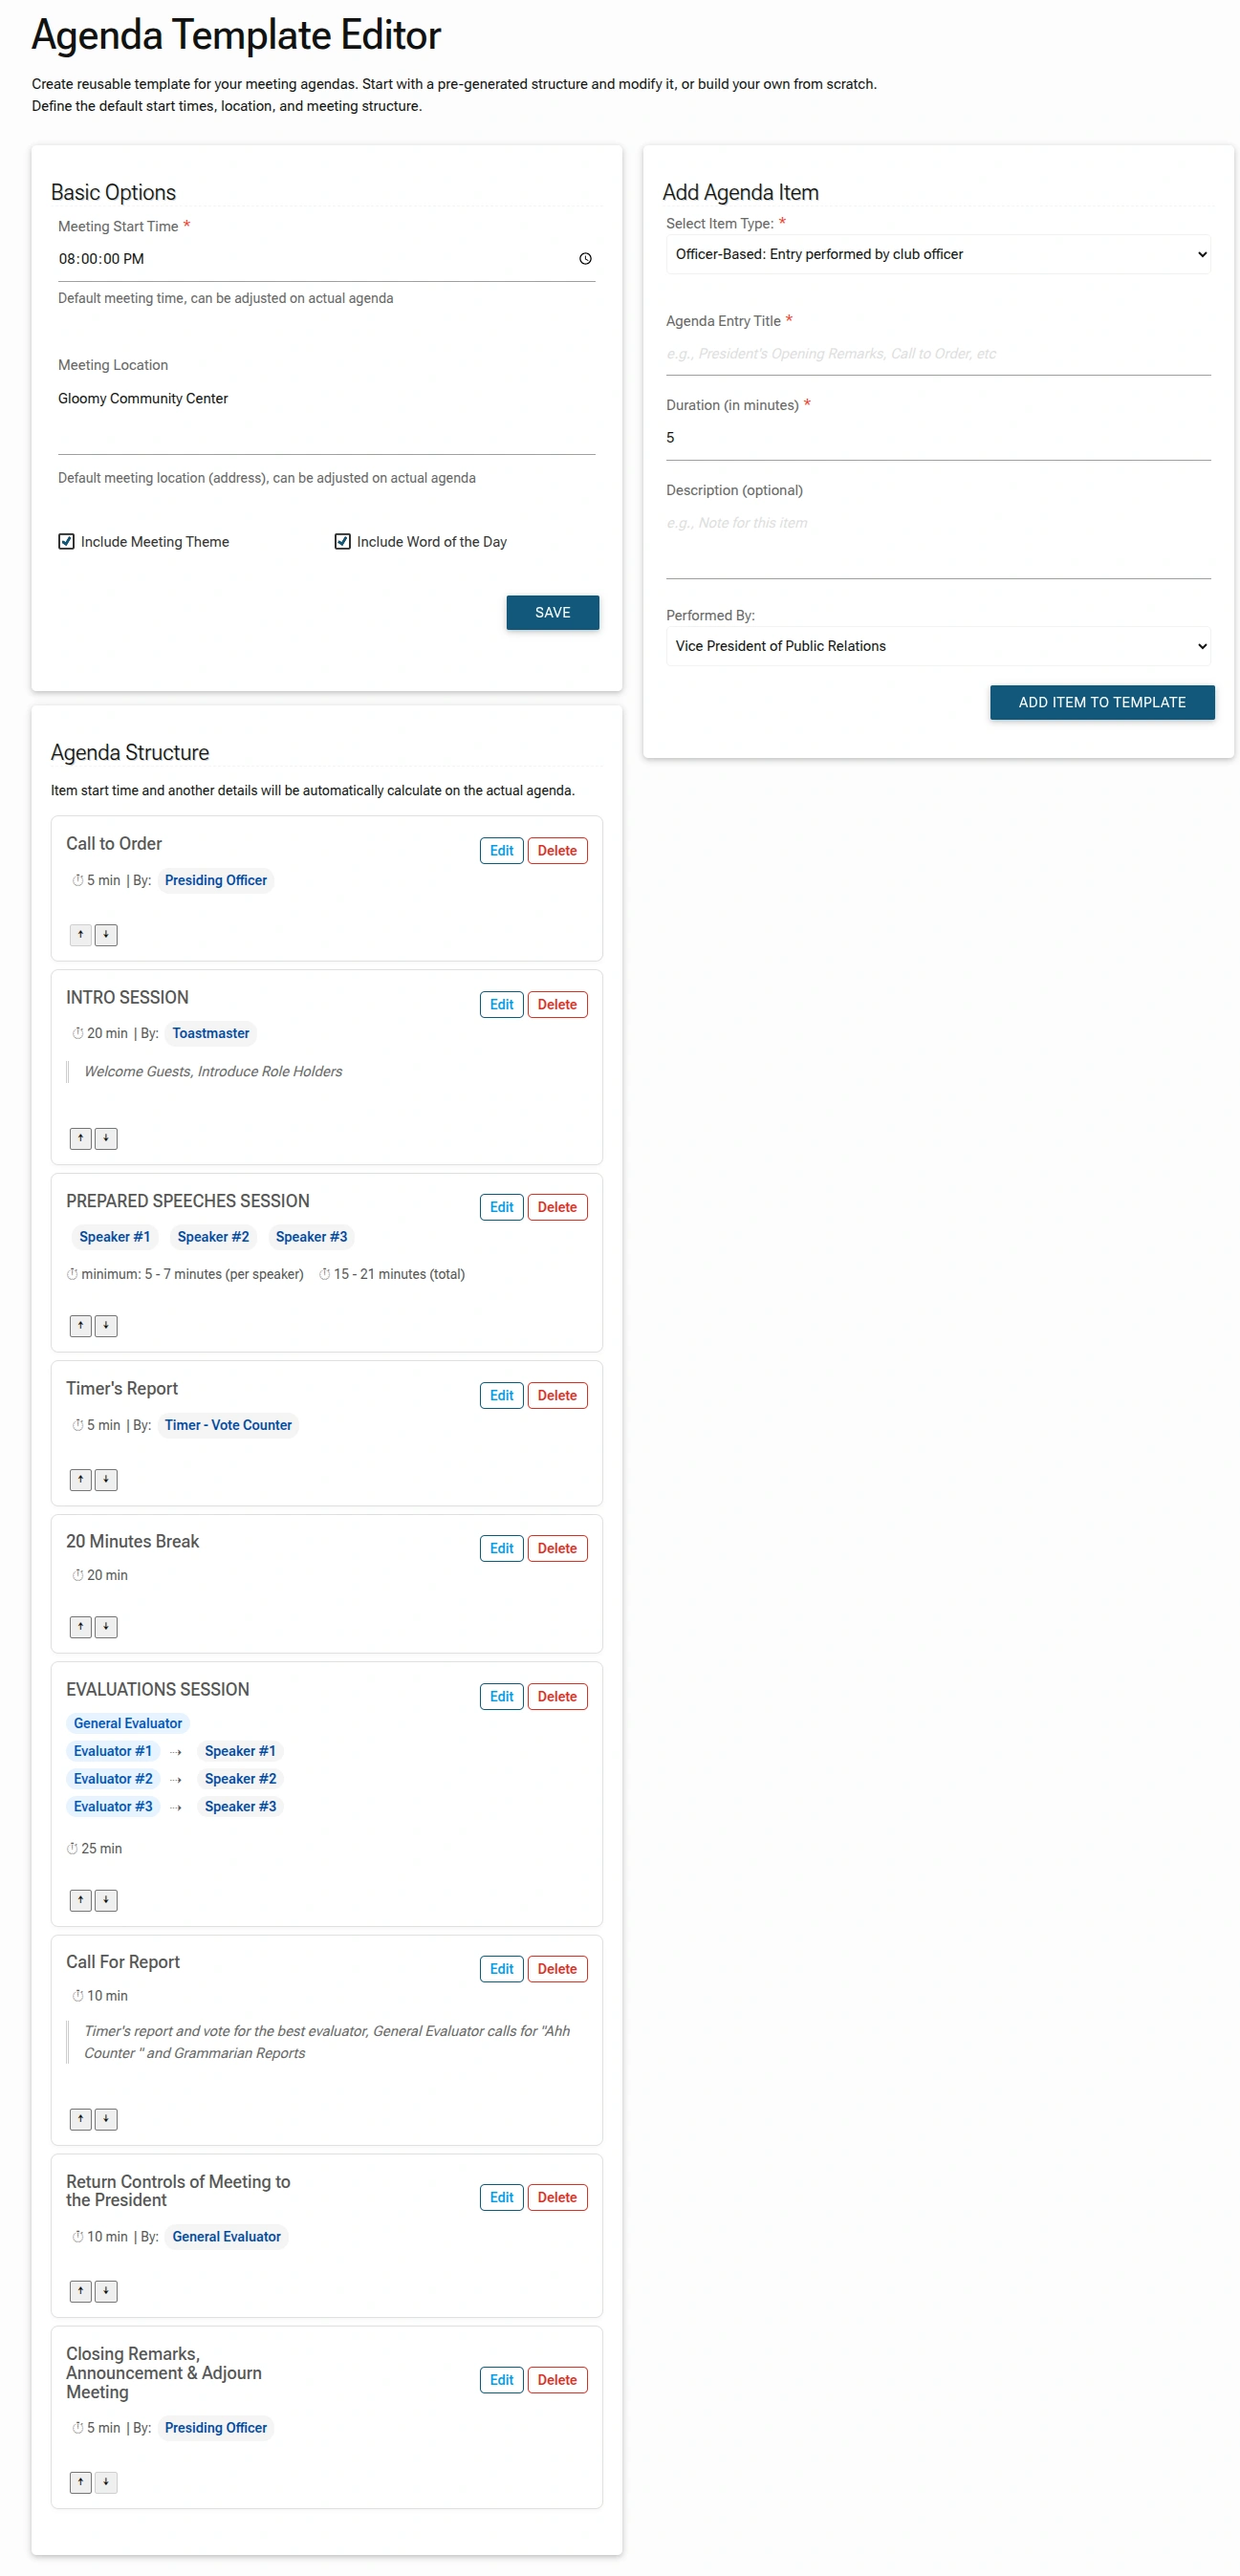


Basic Options
Configure the default settings that will apply to every agenda unless overridden.
- Meeting Start Time: Set the default time for your meetings (e.g.,
08:00:00 PM). This can be adjusted for individual meetings later. - Meeting Location: Enter the default location for your meetings, which can be a physical address (e.g.,
Gloomy Community Center), a virtual meeting link (e.g.,Zoom Meeting), or a descriptive name (e.g.,Online Meeting). This can be updated for individual meetings as needed. - Include Meeting Theme: Check this box if you want to feature a "Meeting Theme" on your agendas.
- Include Word of the Day: Check this box if you want to feature a "Word of the Day" on your agendas.
- Click the
SAVEbutton at the bottom of the "Basic Options" section to save your template.
Adding and Managing Agenda Items
Use the Add Agenda Item panel to build your agenda structure.
Available Item Types
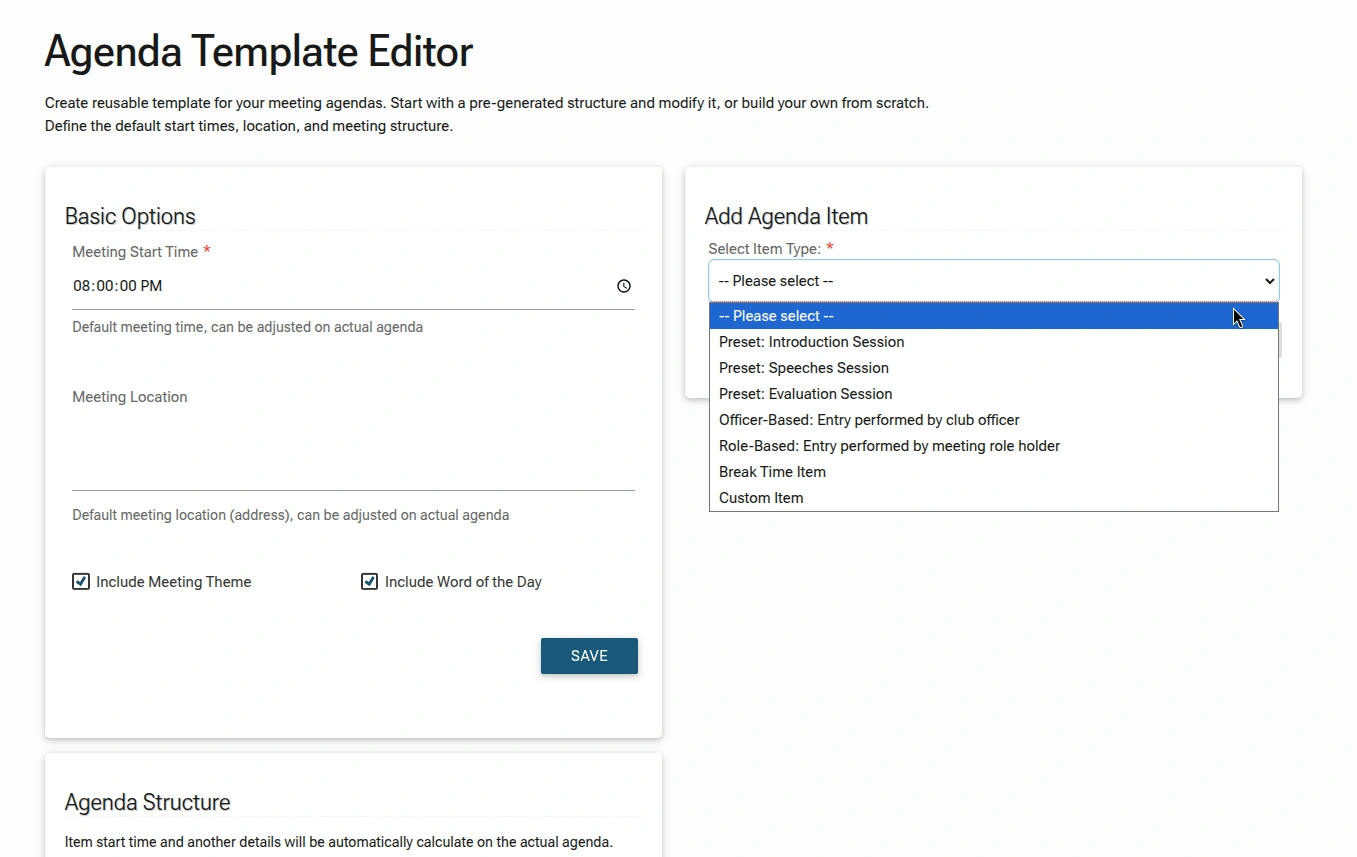
- Preset Sessions: Pre-built blocks like "Introduction Session," "Speeches Session," and "Evaluation Session," which can be easily added to your agenda. These presets automatically fill the agenda item with the respective roles (e.g., Toastmaster, Speaker, Evaluator) and their assigned holders, saving you time and ensuring consistency.
- Officer-Based: A session performed by a specific club officer (e.g., "President", "Secretary"). Choose the officer from a dropdown list.
- Role-Based: A session performed by the person assigned to a specific meeting role (e.g., "Toastmaster", "Vote Counter", "General Evaluator"). The system automatically populates the name based on your schedule.
- Break Time Item: A designated break period to allow attendees to take a pause.
- Custom Item: A fully customizable entry where you define the title, duration, performer, and description.
Adding an Item
- Select an item type from the dropdown.
- Fill out the required fields:
- Agenda Entry Title: The name of the item (e.g., "Call to Order", "Welcome Guests").
- Duration (in minutes): The length of time allocated for this item. This duration will be used to calculate and display the start time for each agenda item, ensuring a smooth flow of the meeting.
- Description (optional): Additional notes or instructions for the item.
- Performed By: For Officer & Roles based items, select the specific role or officer from the dropdown.
- Click the
ADD ITEM TO TEMPLATEbutton.
NOTE:
The available fields may vary depending on the item type selected. For example:
- Preset Sessions and Custom Items may have additional fields, such as a description or specific requirements.
- Officer-Based and Role-Based items will require selecting a performer from a dropdown list.
- Break Time Item may have limited fields, as it's primarily used to indicate a break period.
Managing the Structure
- Edit: Click the
Editbutton to modify an existing item's title, duration, or description. - Delete: Click the
Deletebutton to remove an item from the template. - Reorder: Use the up/down arrows next to each item to move them into your desired order.
Mapping Roles to Items
When creating agenda items, you can link them to specific roles or officers. This allows the system to automatically populate the item with the assigned member's name when the actual agenda is generated.
- For segments that involve a role holder or officer, the system will automatically pull the assigned member's name into that slot, ensuring that the right person is assigned to each task.
- Items without linked roles, such as Break or Custom items, will appear as timed segments or with the value you manually entered, allowing for more flexibility and customization.
The Template Advantage
Set it and Forget it: The goal of the Template Editor is to handle the "boring" repetitive layout work. Once your template is saved, every future meeting you generate will automatically inherit this structure.