Schedule Generator
The Schedule Generator is the heart of TMClubSchedule, transforming your club's settings and member data into a complete meeting plan. By automating role assignments, it ensures a fair rotation while respecting member availability, preference and experience levels.
This is a powerful, automated tool that creates a fair and balanced draft of your club's meeting schedule based on your predefined settings. It intelligently assigns roles to members, taking into account their membership level, past assignments, and planned absences. You can then review, adjust, and publish this draft to finalize your schedule.
Using the Schedule Generator
To begin, click the Schedule Generator icon from the Quick Access widget on your dashboard or navigate to the sidebar and select Schedule Manager > Generate New Schedule.
Step 1: Setting Schedule Parameters
In most cases, the system automatically determines the next meeting date based on your Schedule Options. However, you will be prompted to manually select a Start Date in the following scenarios:
- First-Time Use: When you are setting up your club's very first schedule.
- No Future Records: If the club has been inactive and there are no upcoming meeting dates currently on record.
- Custom Frequency: If your club uses the Custom meeting frequency, you must manually pick each meeting date for every generation cycle.
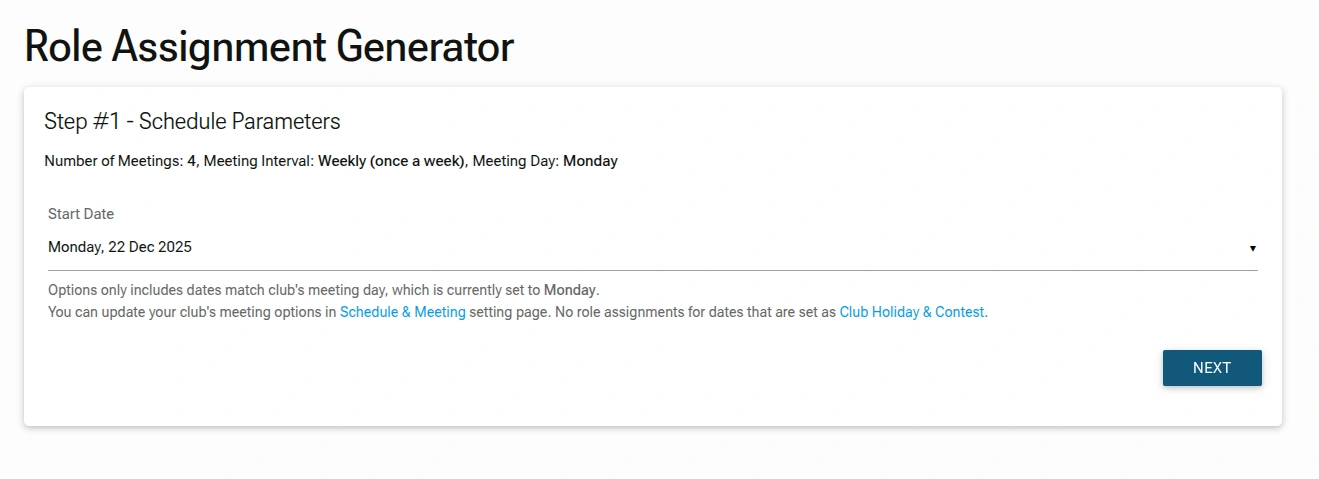
For subsequent generations, the system will automatically pick the next available meeting date after your last scheduled meeting. You may not see the schedule parameter form when the system picks the next meeting date and generates the schedule directly.
Step 2: Understanding Your Role Assignment Generator Results
After clicking NEXT, the system generates the schedule and displays it for your review.
Two types of schedule previews you might see when using the Role Assignment Generator. These previews allow you to review the system's logic and assignments before you save the schedule draft.
Case #1: Full Schedule Generation
The generator will create a new schedule from scratch in the following situations:
- Your club is using the generator for the first time.
- Your previous schedule has been completely finished (all meeting dates are in the past).

In this view, the generator builds a completely fresh set of assignments from scratch.
The maximum number of generated meeting dates depends on the 'Meetings to Generate' setting on the Schedule Option page
Case #2: Partial/Top-Off Generation
When you have upcoming 'future' meetings on your current schedule but want to add more meetings to the calendar, the system 'fills in the gaps'. It respects the existing meetings and only generates assignments for new dates to create complete sets.

The maximum number of generated meeting dates depends on the 'Meetings to Generate' setting on the Schedule Option page.
Look for the New badge next to the dates. This indicates which meetings were just generated and which were already part of your existing calendar.
Key Features:
Regardless of which version you see, keep an eye on these helpful details:
- Reason Box: Located under each name, this explains why the system chose that person (e.g., "First time as a Speaker", "This is President only role", "Longest gap since last being Evaluator"). This provides transparency into the generator's logic.
- Member Info: Each slot displays the member's phone and email so you can quickly spot-check if the right people are being assigned.
- Control Buttons:
- Regenerate: Try to get a different arrangement while keeping the rotation rules and logic applied.
- Save & Modify: This will save generator result as a draft and allows you to make further adjustments before publishing.
Step 3: Reviewing & Modifying Schedule Draft
After saving the generator result, you will be directed to the Schedule Draft view, where you can make adjustments to the schedule before publishing it to your members. At this stage, any changes to the schedule assignments will only be visible to the Club Administrator; no members will see or be notified about the changes.
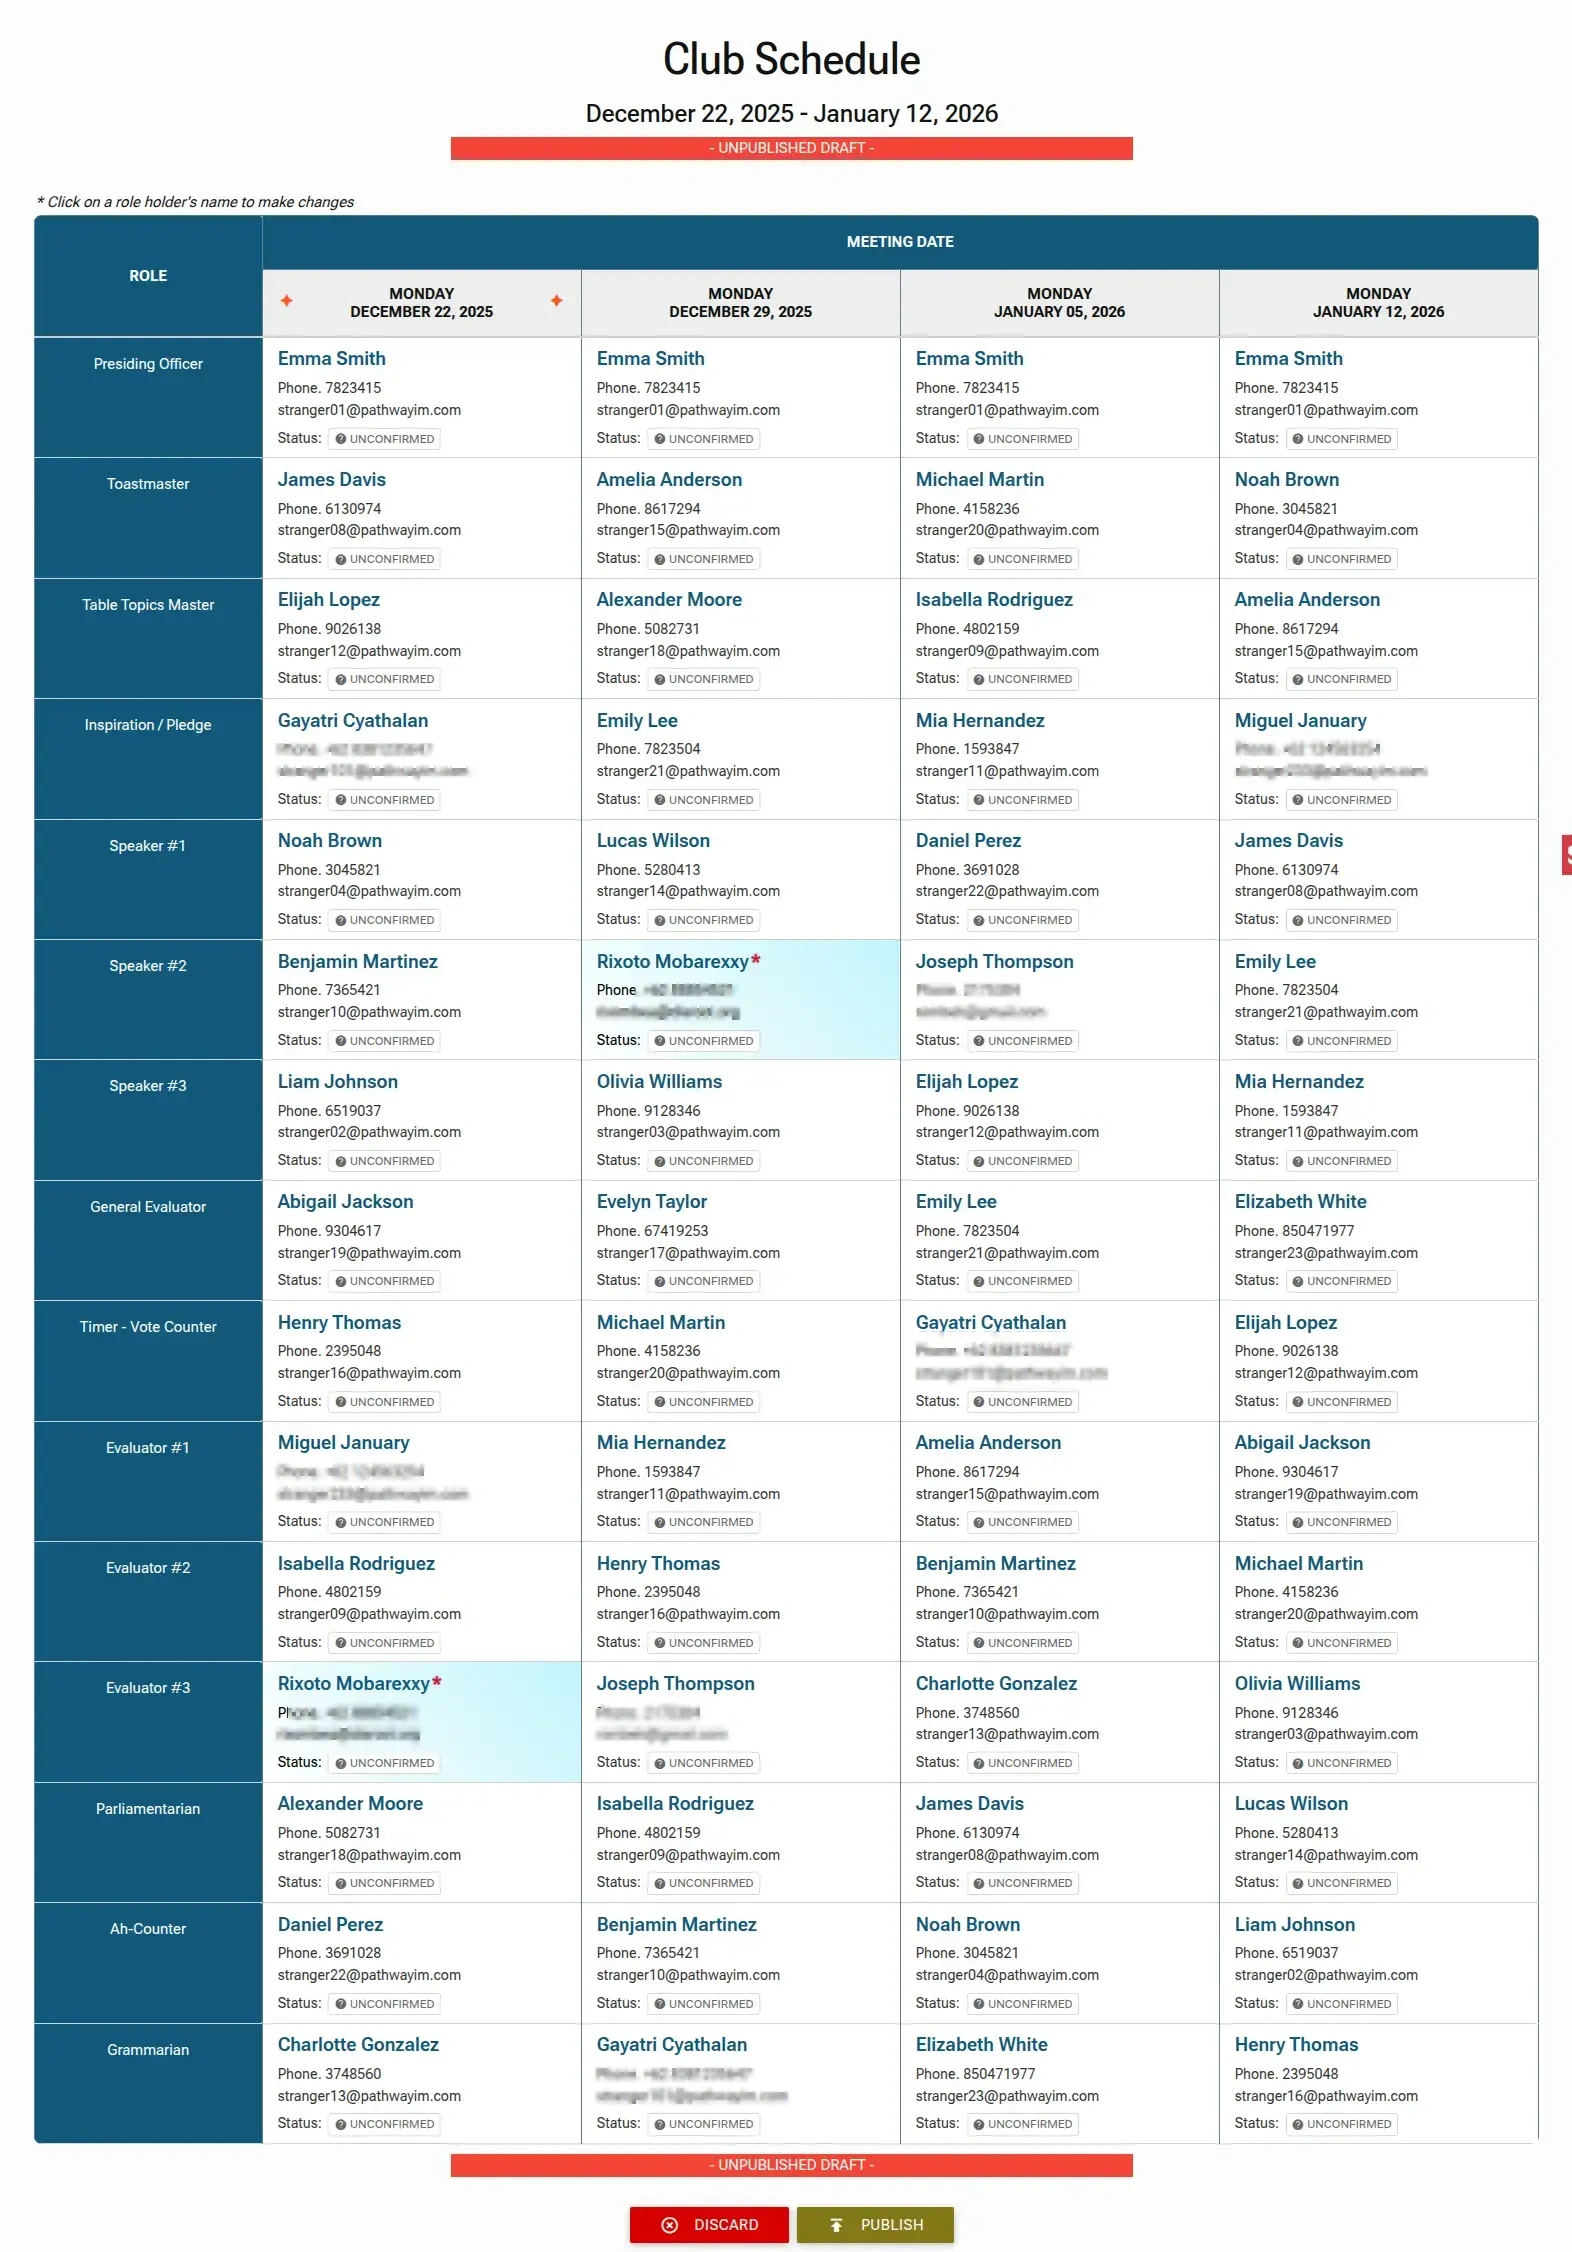
- Unpublished Draft Banner: A prominent red banner at the top reads
- UNPUBLISHED DRAFT -. This reminds you that the schedule is not yet final and is subject to change. - Interactive Grid: The main area is a large table showing all roles against all meeting dates.
- Status: All assignments are initially marked as
UNCONFIRMED. - Visibility: Drafts are private to Administrators. Members cannot see or interact with these meetings yet, allowing you to make adjustments in secret.
- Manual Edits: You can always update or swap roles within the draft if you feel a different member would be better suited for a specific slot.
- Draft Expiry: Note that changing core Meeting Roles or Meeting Frequency Settings while a draft exists will cause that draft to be discarded.
- Discard: Click
DISCARDbutton if you want to abandon the entire draft and start over. - Publish: Click
PUBLISHbutton to finalize the schedule and send notification about newly published schedule to all club members.
Note
Detail process of updating/swapping role holder is documented on the Updating an Assignment section.
Step 4: Finalizing and Publishing the Schedule
When you are satisfied with the assignments, click the Publish button.
What Happens When You Publish
- Finalization: The draft becomes the official, published schedule. Any future edits can be done through the "Current Schedule" page.
- Member Notifications: The moment you publish, an automated email is sent to every member. This email informs them of the new schedule and highlights any roles they have been assigned.
- Member Confirmation: Upon receiving the email, members can log into their own dashboard to Accept or Decline their roles.
Post-Publication Updates
A schedule is never "locked." You can continue to update a published schedule if a member declines a role or a last-minute change occurs. Unlike a draft, these changes are immediately visible to members on their dashboard.
Best Practices
- Review Before Publishing: Always take time to review the generated draft. While the algorithm is intelligent, human oversight ensures fairness and addresses any unique club dynamics.
- Use Regenerate Wisely: If the first draft doesn't feel right, don't hesitate to click "Regenerate." The system will create a different, equally valid arrangement.
- Communicate Changes: If you make significant manual adjustments, consider sending a quick announcement to let members know about any unexpected assignments.
- Leverage Member Self-Service: Once published, encourage members to confirm their roles promptly by accessing Member Dashboard. This helps you quickly identify any unconfirmed or declined roles that need to be filled.
Administrator Tip
Before hitting "Generate," double-check that your Planned Absences and Holidays are up to date. The generator will automatically skip any member marked as "Busy" and omit any dates marked as "Holiday".
By using the Schedule Generator, you save countless hours of manual scheduling while ensuring that roles are distributed fairly and thoughtfully across your membership. It transforms a complex administrative task into a simple, efficient, and collaborative process.